
Introduksjon til U7E
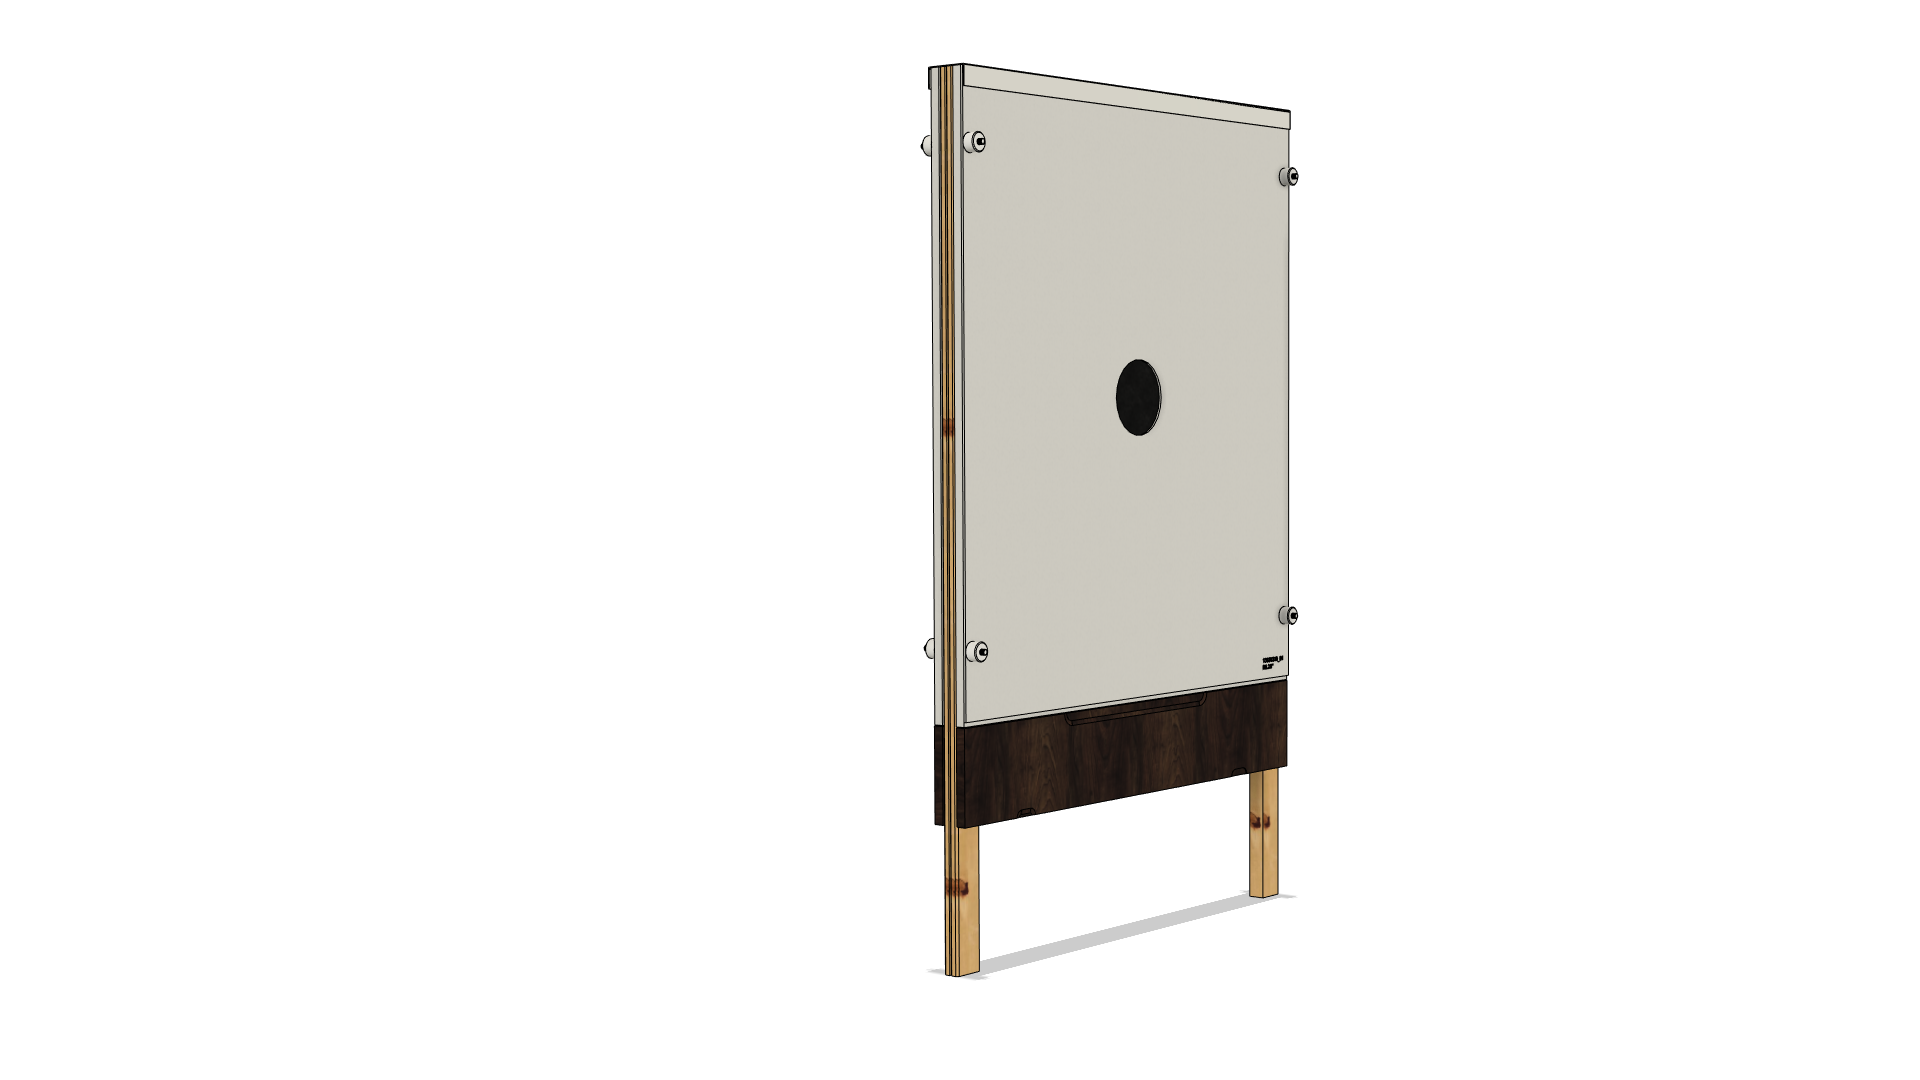
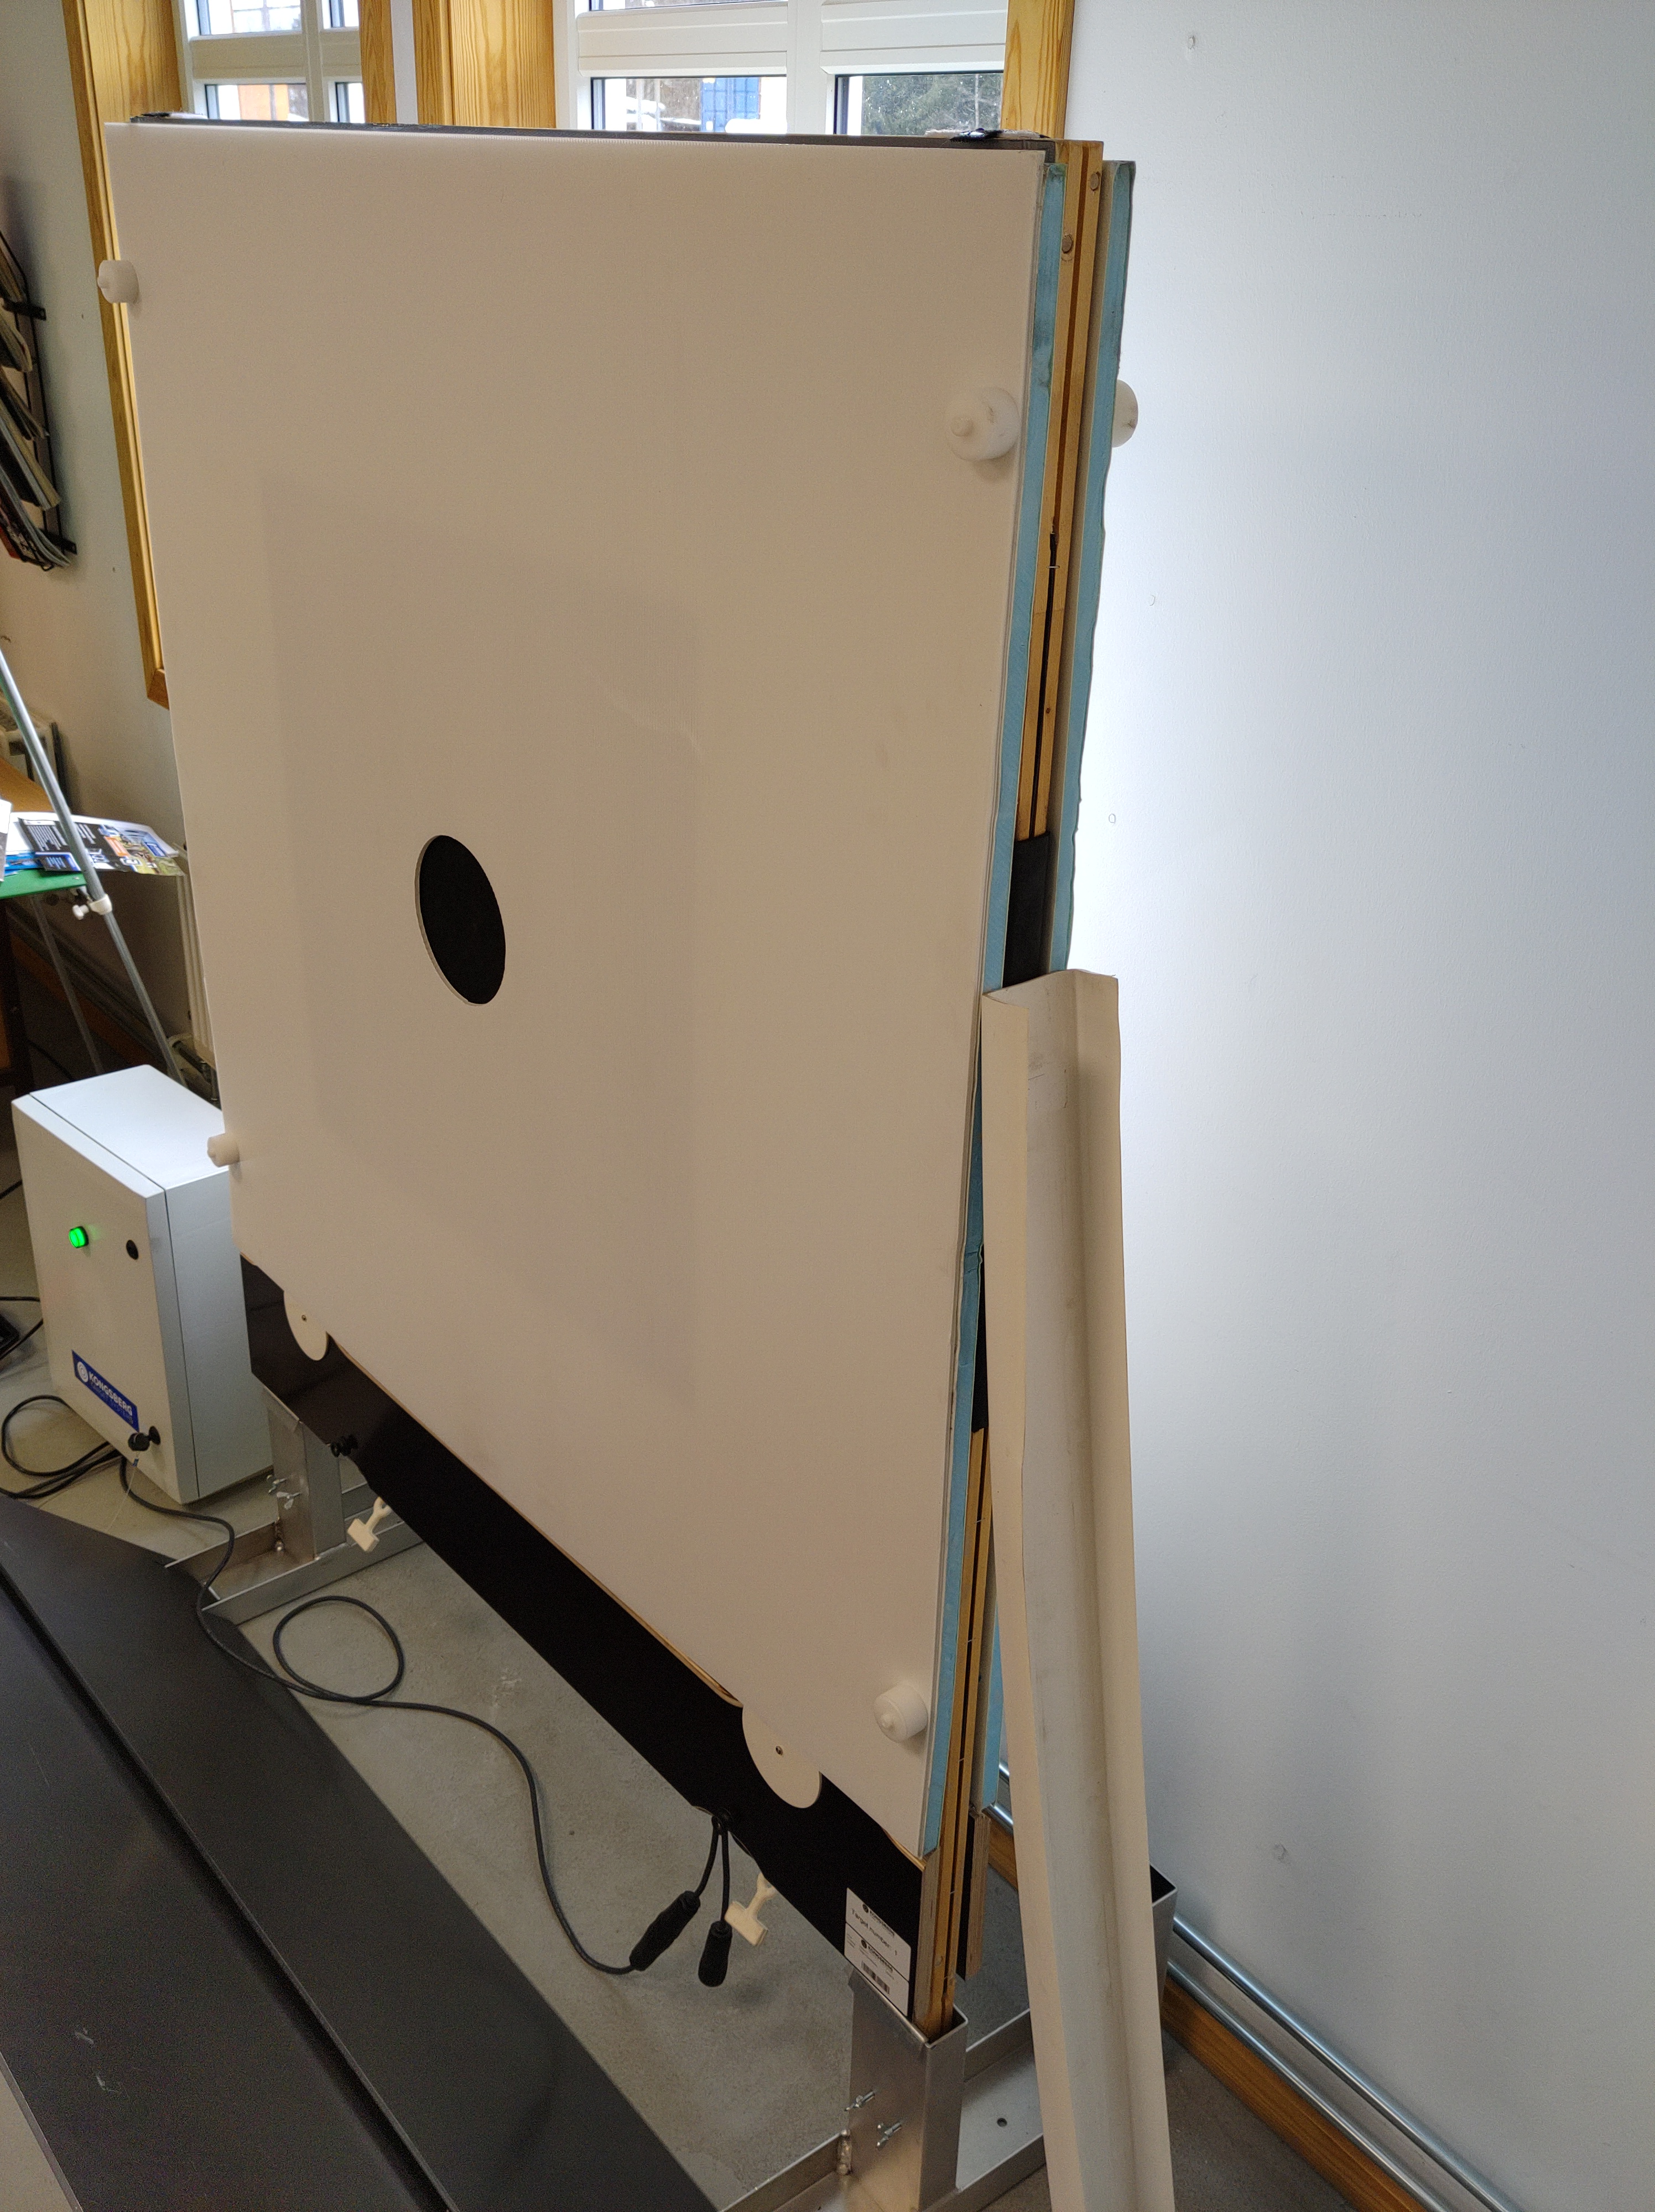
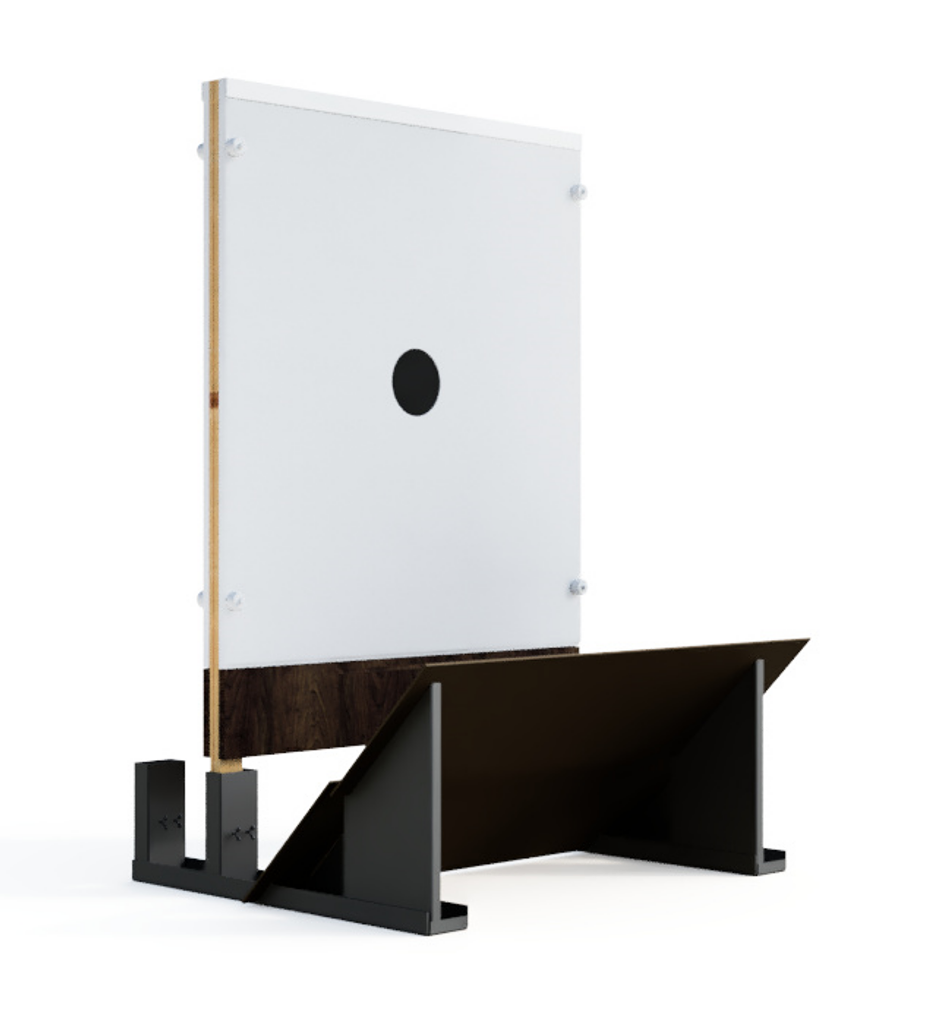
U7E eScore-skiven er et neste generasjons elektronisk skive basert på akustiske sensorer. Det fungerer godt med supersonisk ammunisjon og er designet for å plasseres på 100–200 meters avstand. U-skiven har all elektronikk og sensorer plassert i bunnen av skiven, noe som gjør det ekstremt robust når det plasseres riktig (bak en voll eller med beskyttelsesplater).
Funksjoner ved U7E-skiven
- 3 akustiske sensorer, alle plassert nederst på skiven
- Horisontale og vertikale gummibånd tilgjengelig
- Manuell rotasjon av gummibånd
- Ekstra rustning anbefales
- Bredt utvalg av blinkmotiv er tilgjengelig
- Styrepinnens design muliggjør raskt bytte av blinkmotiv uten behov for ytterligere nullpunktjustering.
- Kan brukes med et bredt spekter av supersoniske kalibre - fra .223 til .338LM og mer
Tekniske spesifikasjoner og dimensjoner
EN |
1160 mm |
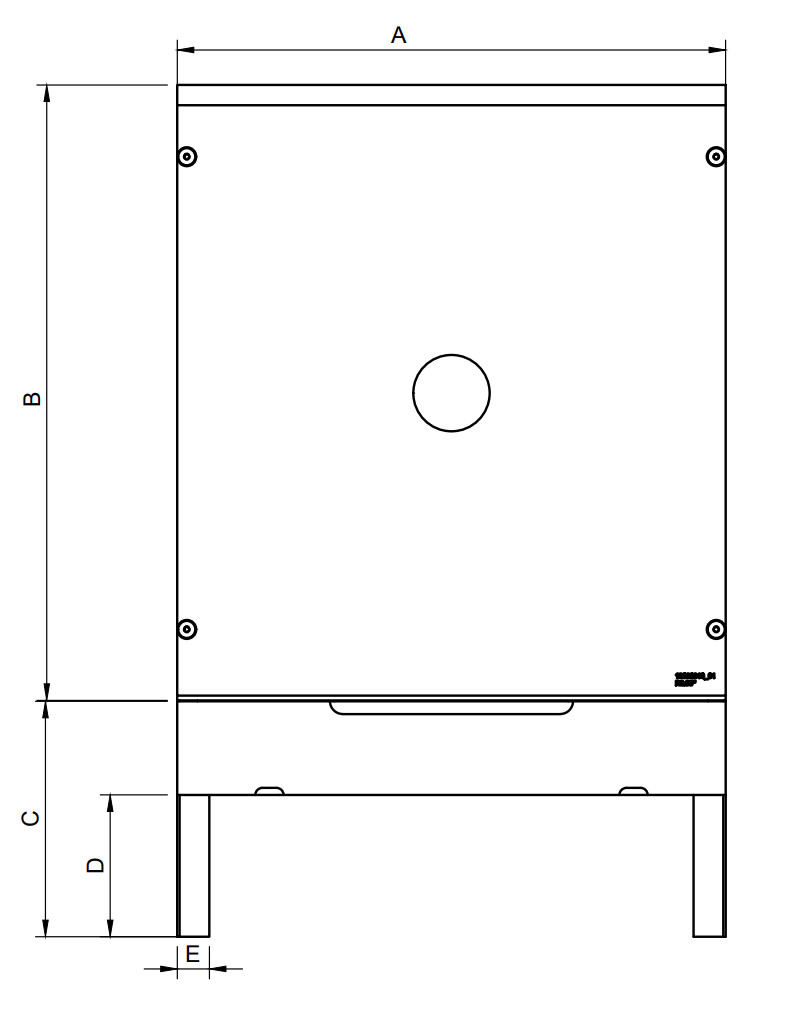 |
B |
1300 mm |
|
C |
500 mm |
|
D |
300 mm |
|
E |
68 mm |
 |
F |
36 mm |
|
G |
92 mm |
|
H |
155 mm |
| Temperaturområde | -30 til +60 °C |
| Vekt | ~ 25 kg |
| Strømforbruk | ~ 4 W ved 24 VDC |
| Kaliber | Supersoniske prosjektiler |
U Target exploded view and parts list
Exploded view Below is an exploded view of the components used in a regular eScor...
Exploded view
Below is an exploded view of the components used in a regular eScore U- target.
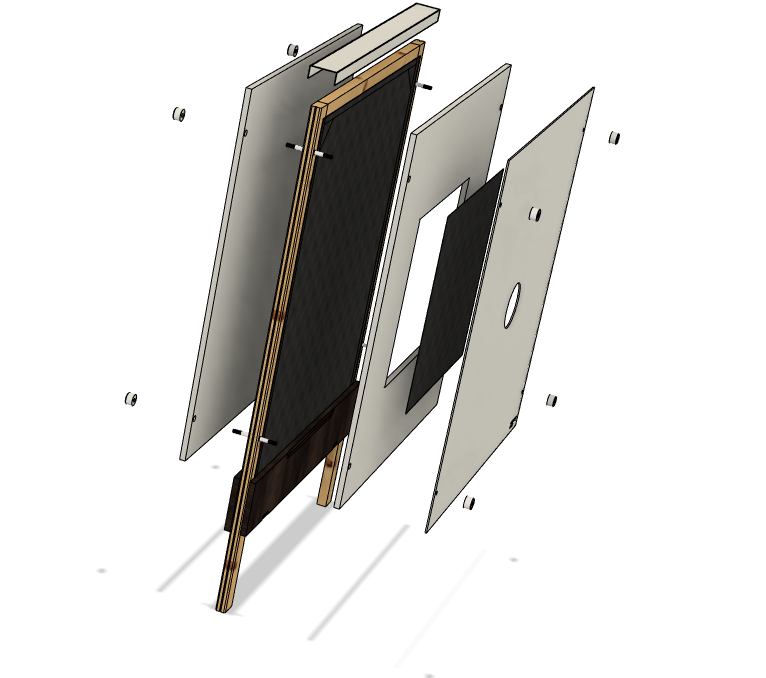
Part list
| ID | Description |
| 1 | Target frame with hatches, cables, acoustic and temperature sensors and target electronics |
| 5 | Front temperature shield (Variants available dependent of target face) |
| 6 | Rear temperature shield |
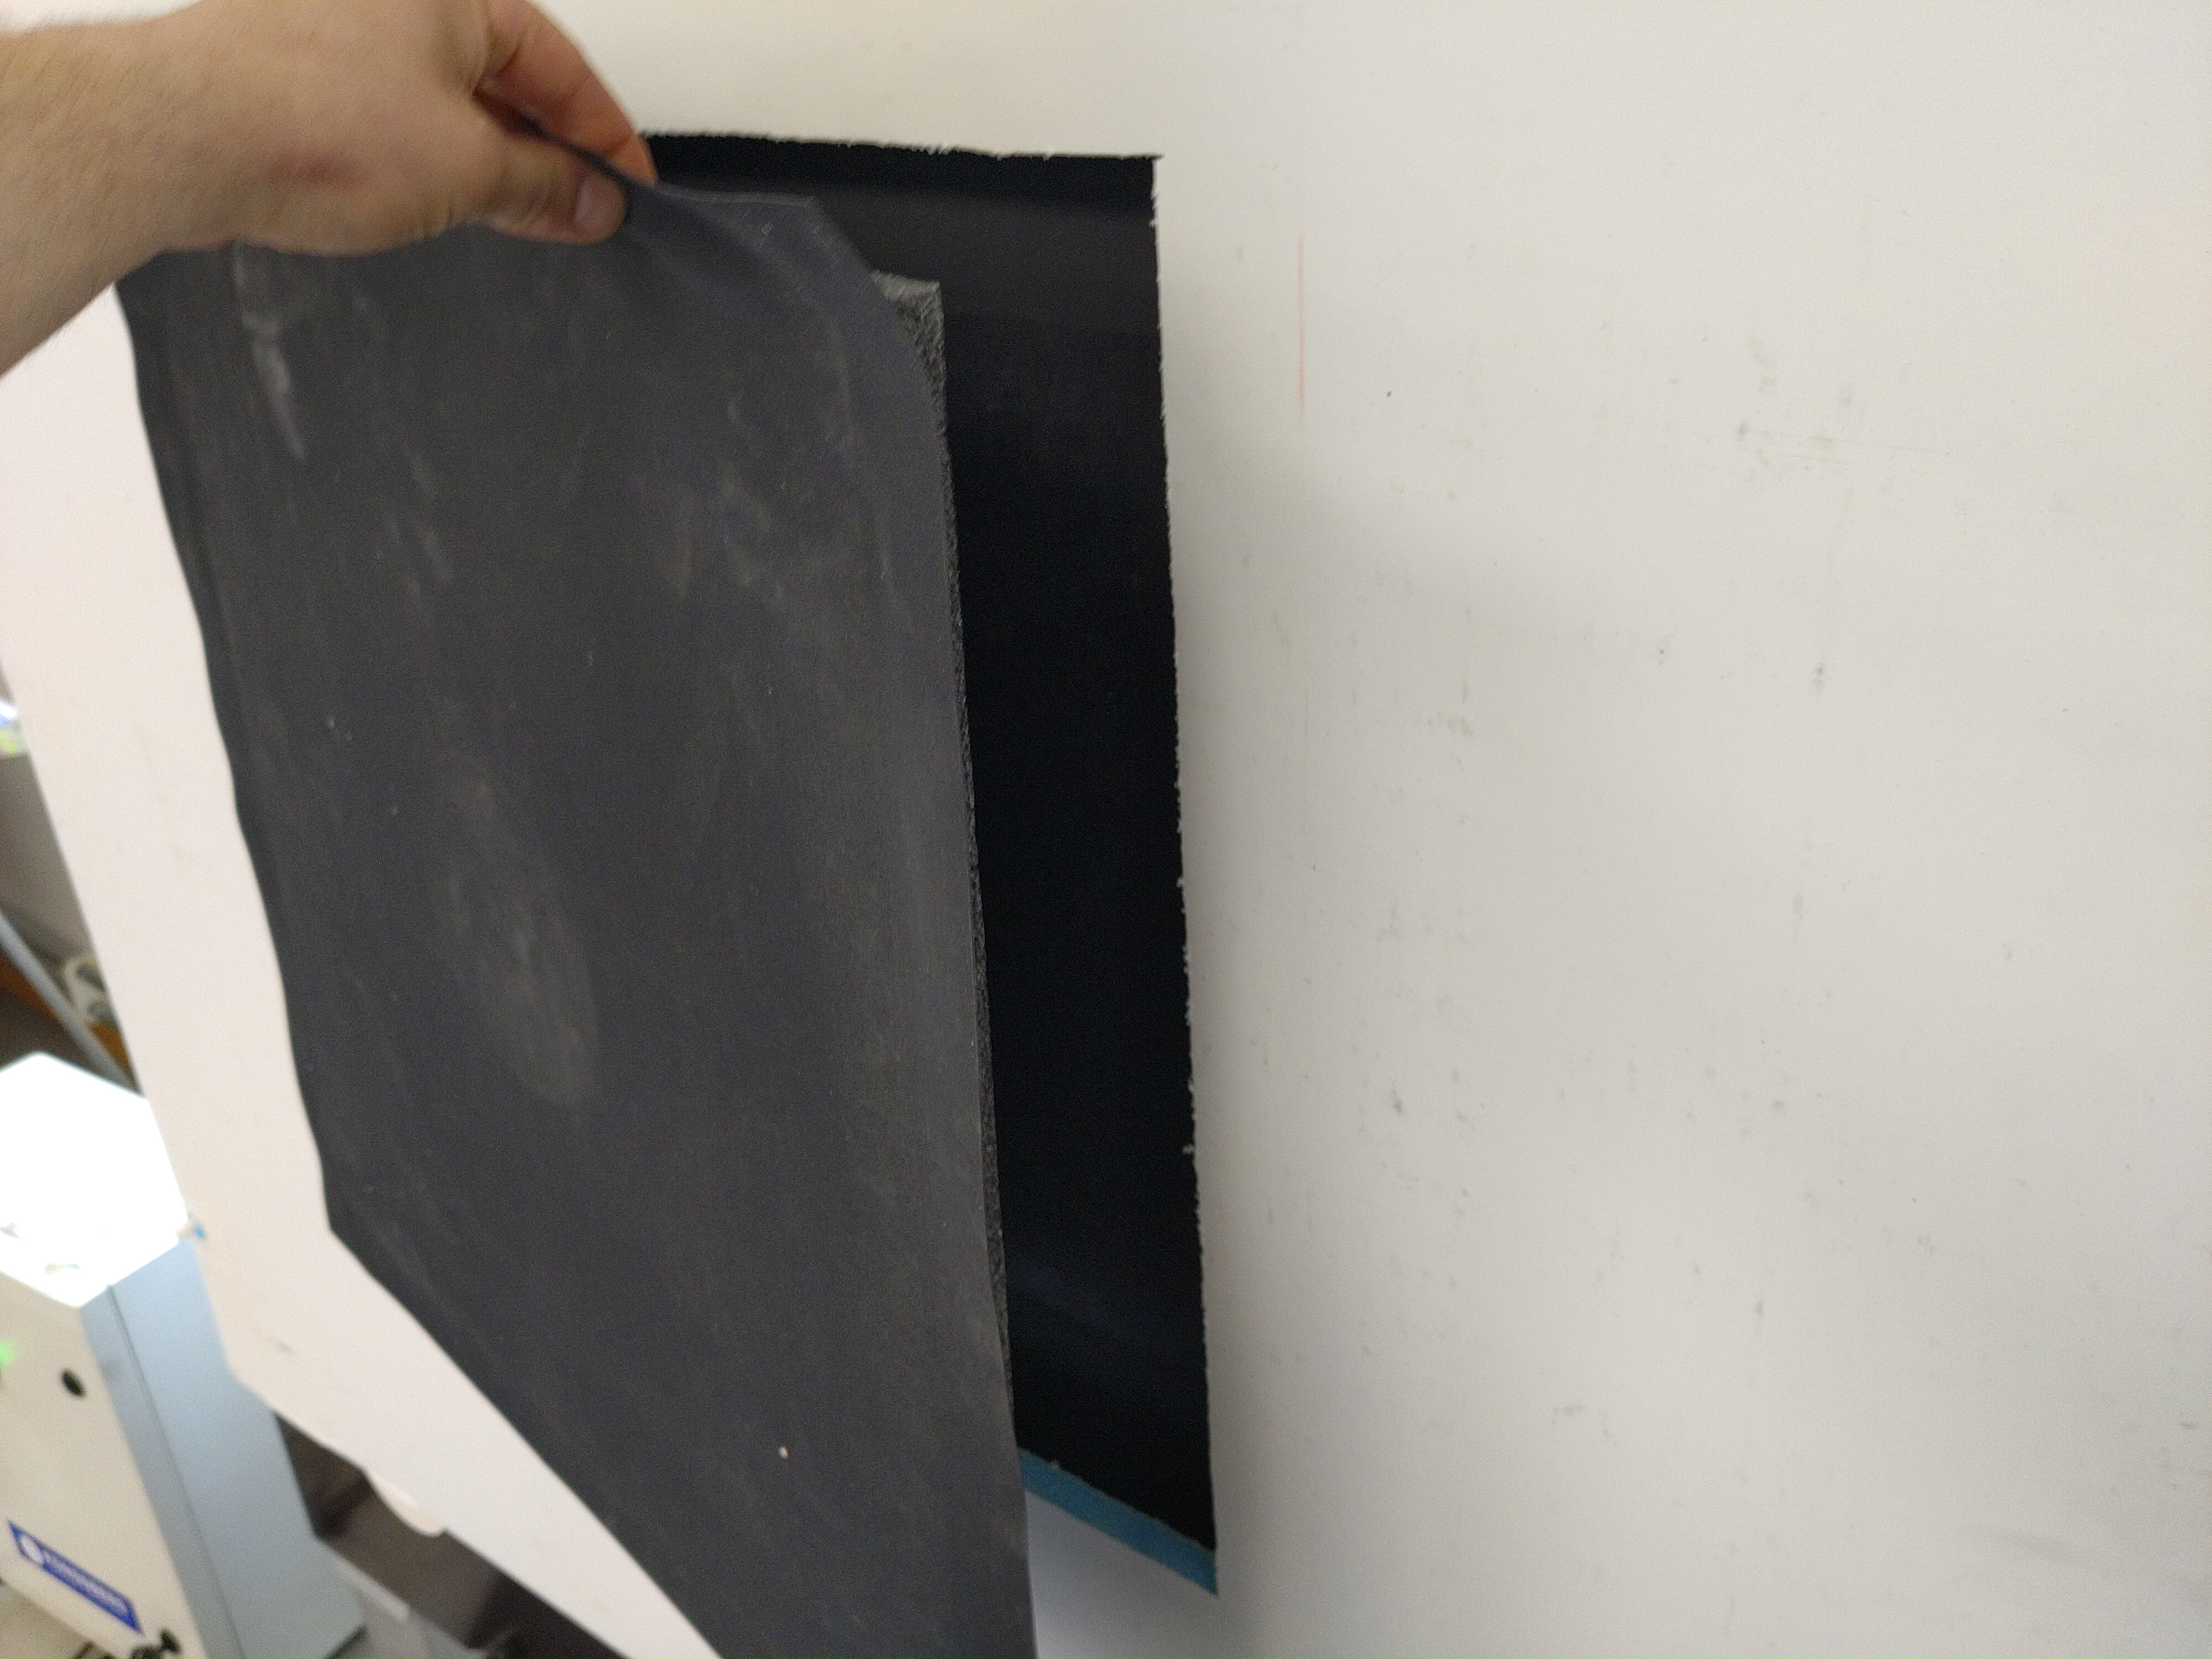
| 7 | Expanded plastic sheet with rubber (Variances according to cutout in Front temperature shield) |
| 8 | Target face (Contact your Kongsberg Target Systems dealer for available options) |
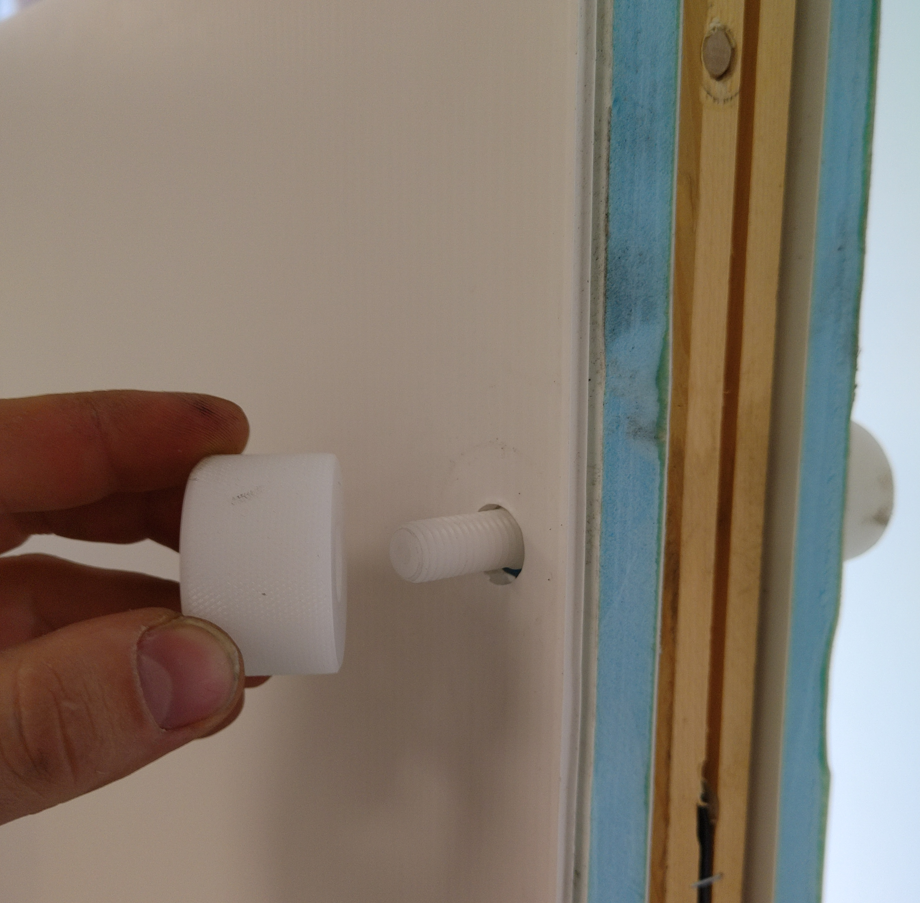
| 9 | Guide pin nuts (x8) |
| 10 | Target top cover |
| 11 | Measurement assembly with target electronics, wiring and 3x acoustic sensors |
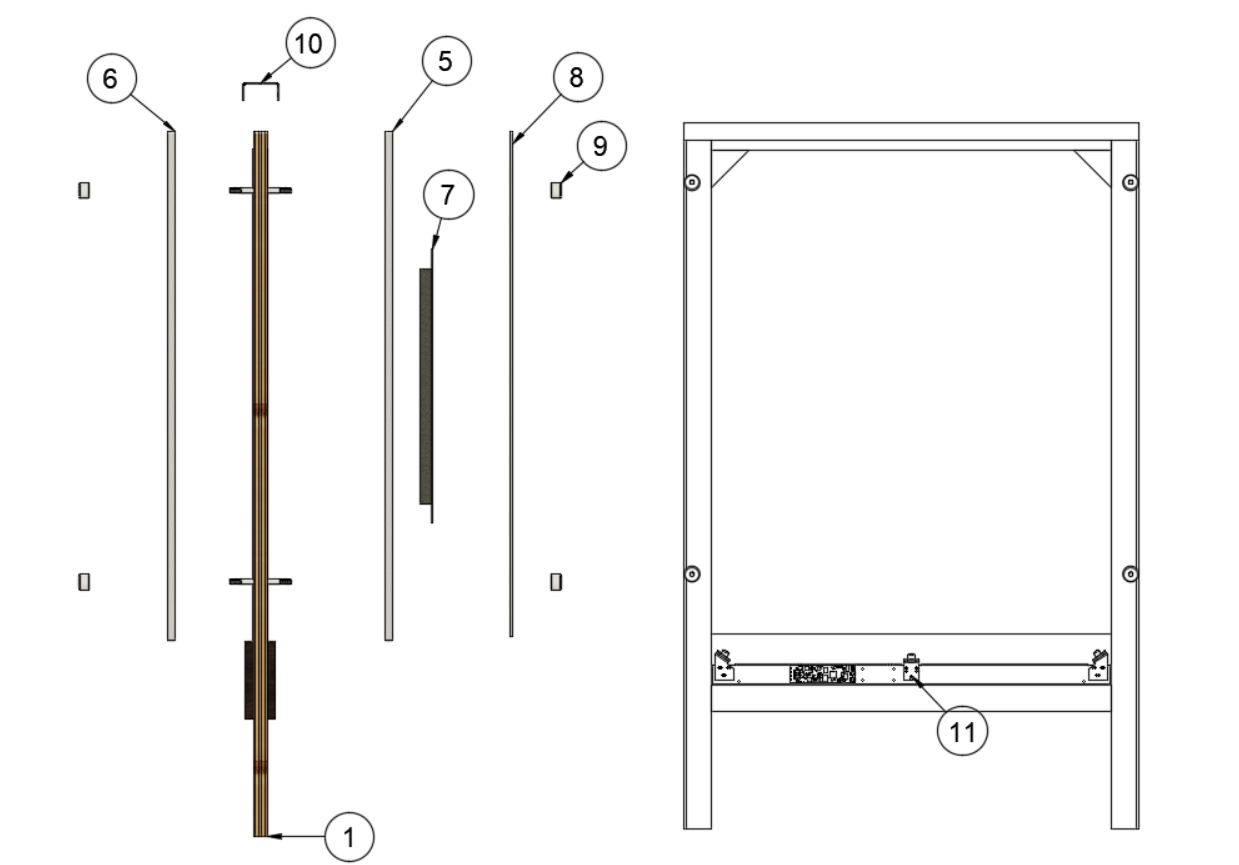
Demontering
U target disassembly
...
Vedlikehold og reparasjoner
Maintenance intervals U7E
Recommended maintenance intervals of the H1E-target The recommended rule of thumb
Recommended maintenance intervals of the U7E-target
The recommended rule of thumb rotation intervals are given in the following table:
| Shooting distance | Rotational frequency |
| 100 m | After 500 rounds |
| 200 m | After 800 rounds |
| 300 m | After 1500 rounds |
Note that the table above assumes normal full jacketed bullets and relatively good groupings. If groupings are large the intervals can be even longer.
For å finne informasjon om vedlikehold og reparasjoner, utvid fanene nedenfor eller finn favorittartikkelen din på docs.kongsbergtargets.com (åpnes i ny fane)
Vedlikehold av sensorer (ved utskifting av gummibånd)
Maintain sensors on U targets
Maintainenance of sensors on eScore U targets Equipment needed - Small brush Proc...
Maintainenance of sensors on eScore U targets
Equipment needed
- Small brush
Procedure
Step 1 - Remove target face and temperature screen:
Remove top rain cover
Unscrew the four front guide pin nuts
Remove target face and temperature screen
Step 2 - Open service panel
Open the service lid by releasing the two rubber straps on the front of the target service hatch. Lift the lid up to access electronics compartment.
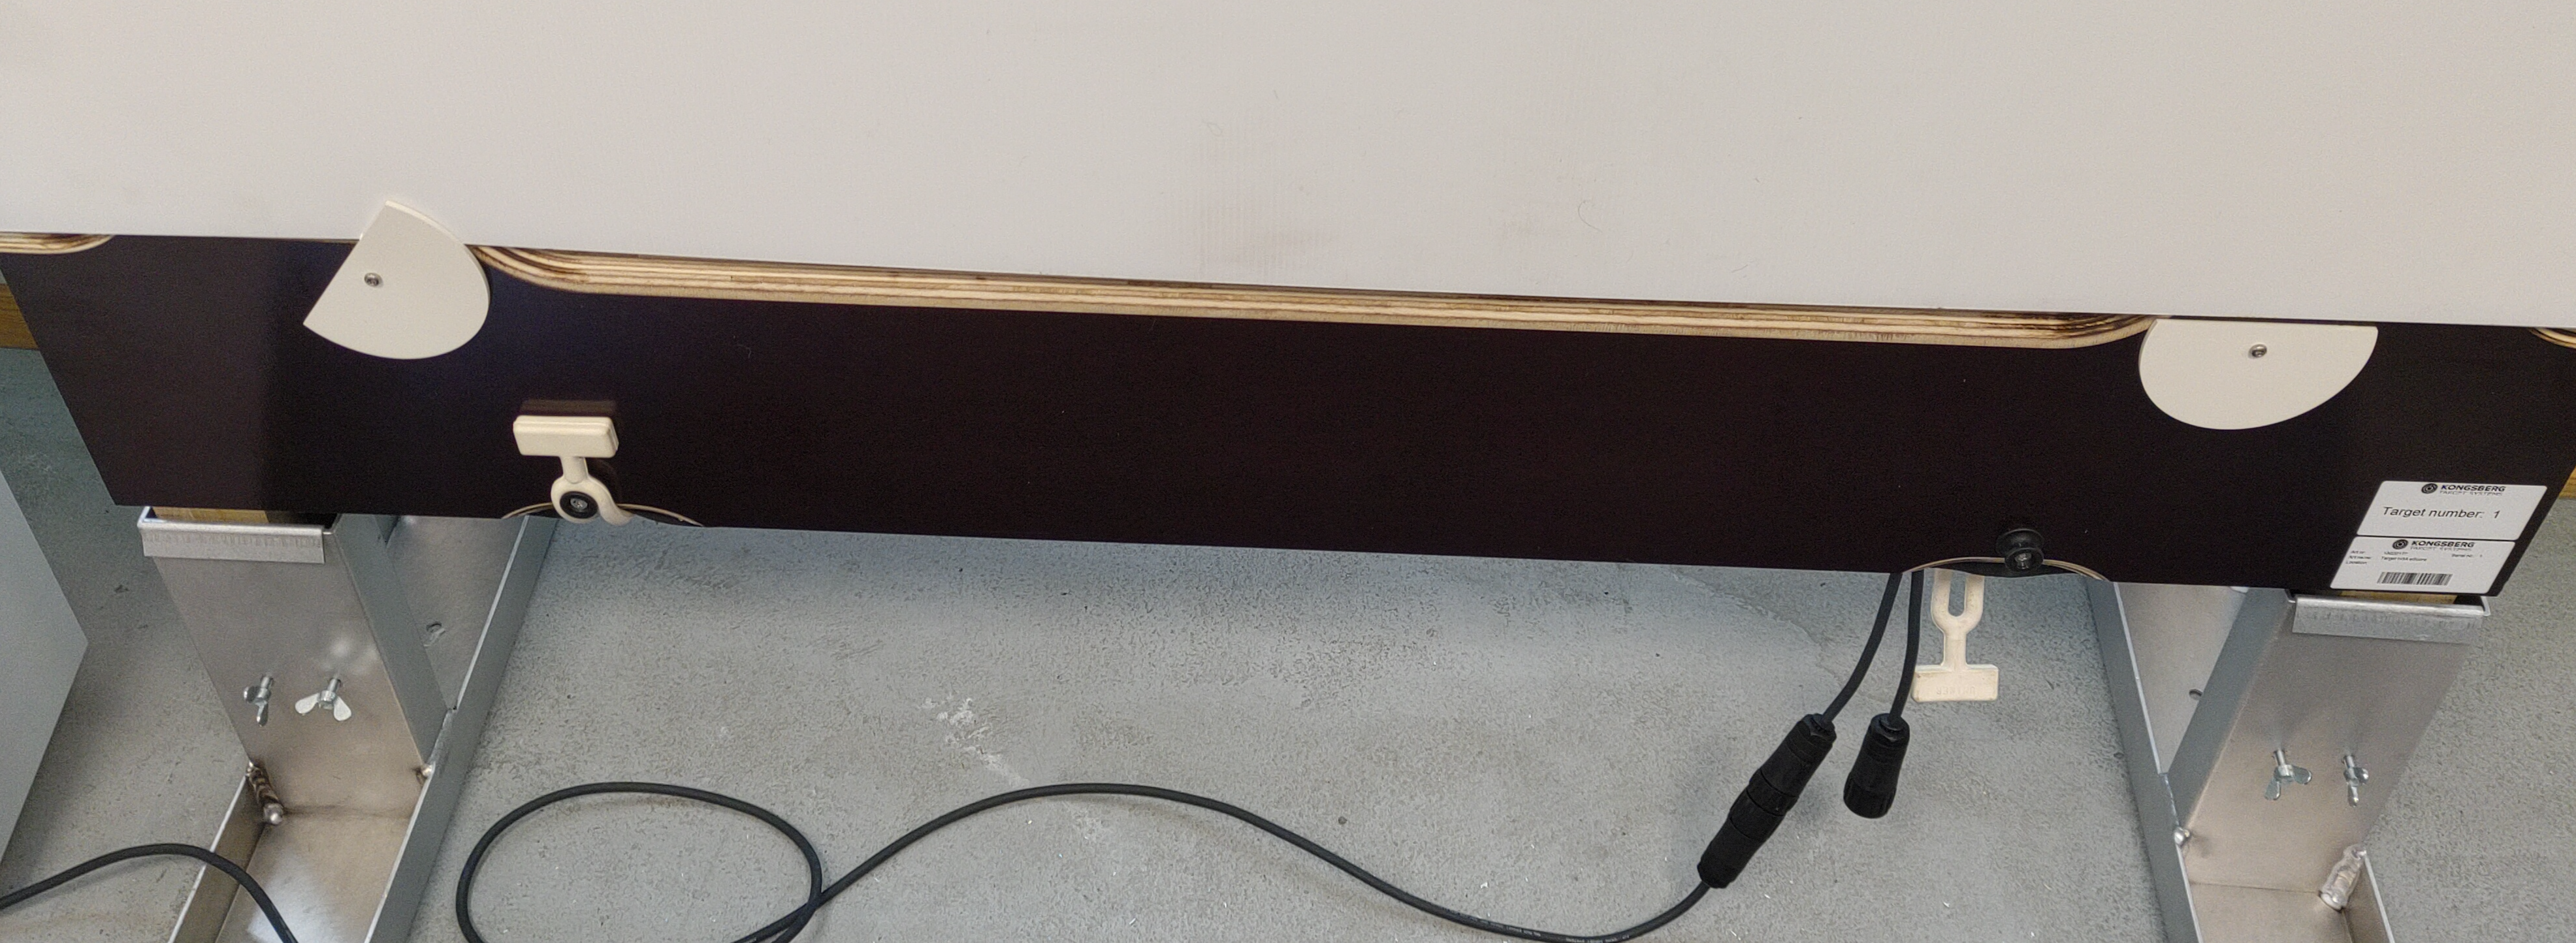 Rubber straps keeps the service hatched closed. Right side is released
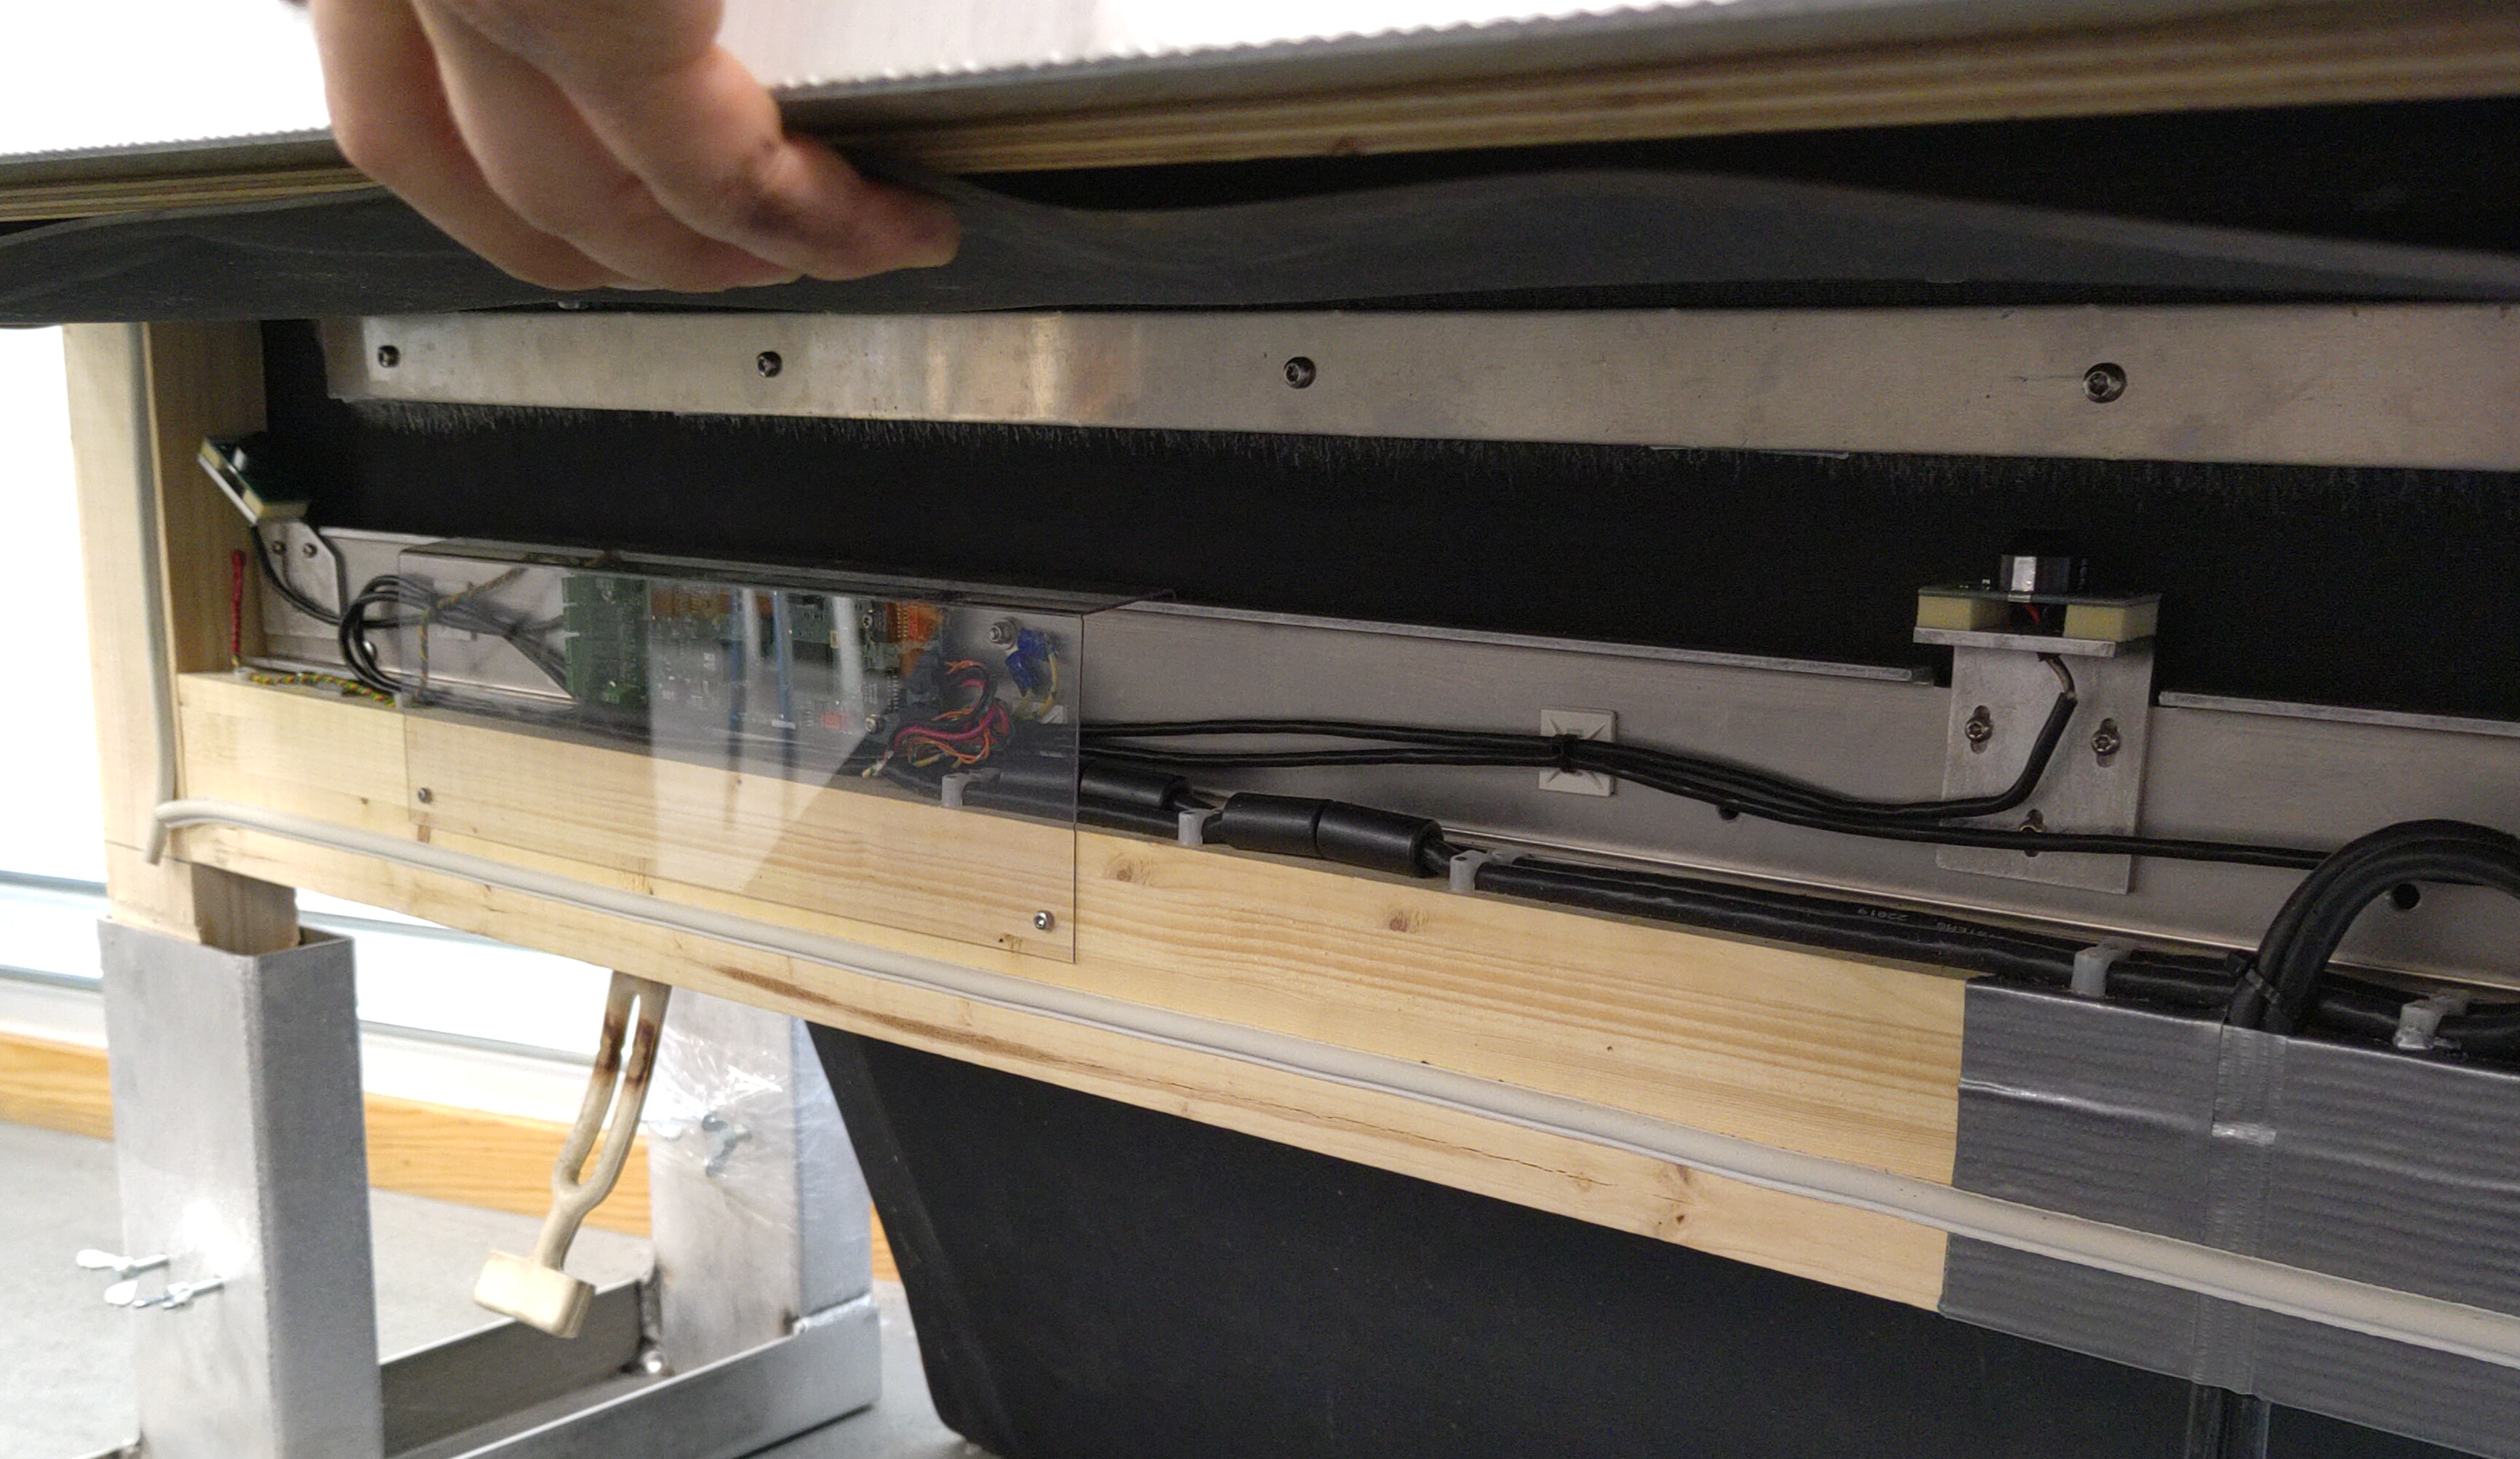 Lifting the service hatch reveals electronics and sensors. (U-target)
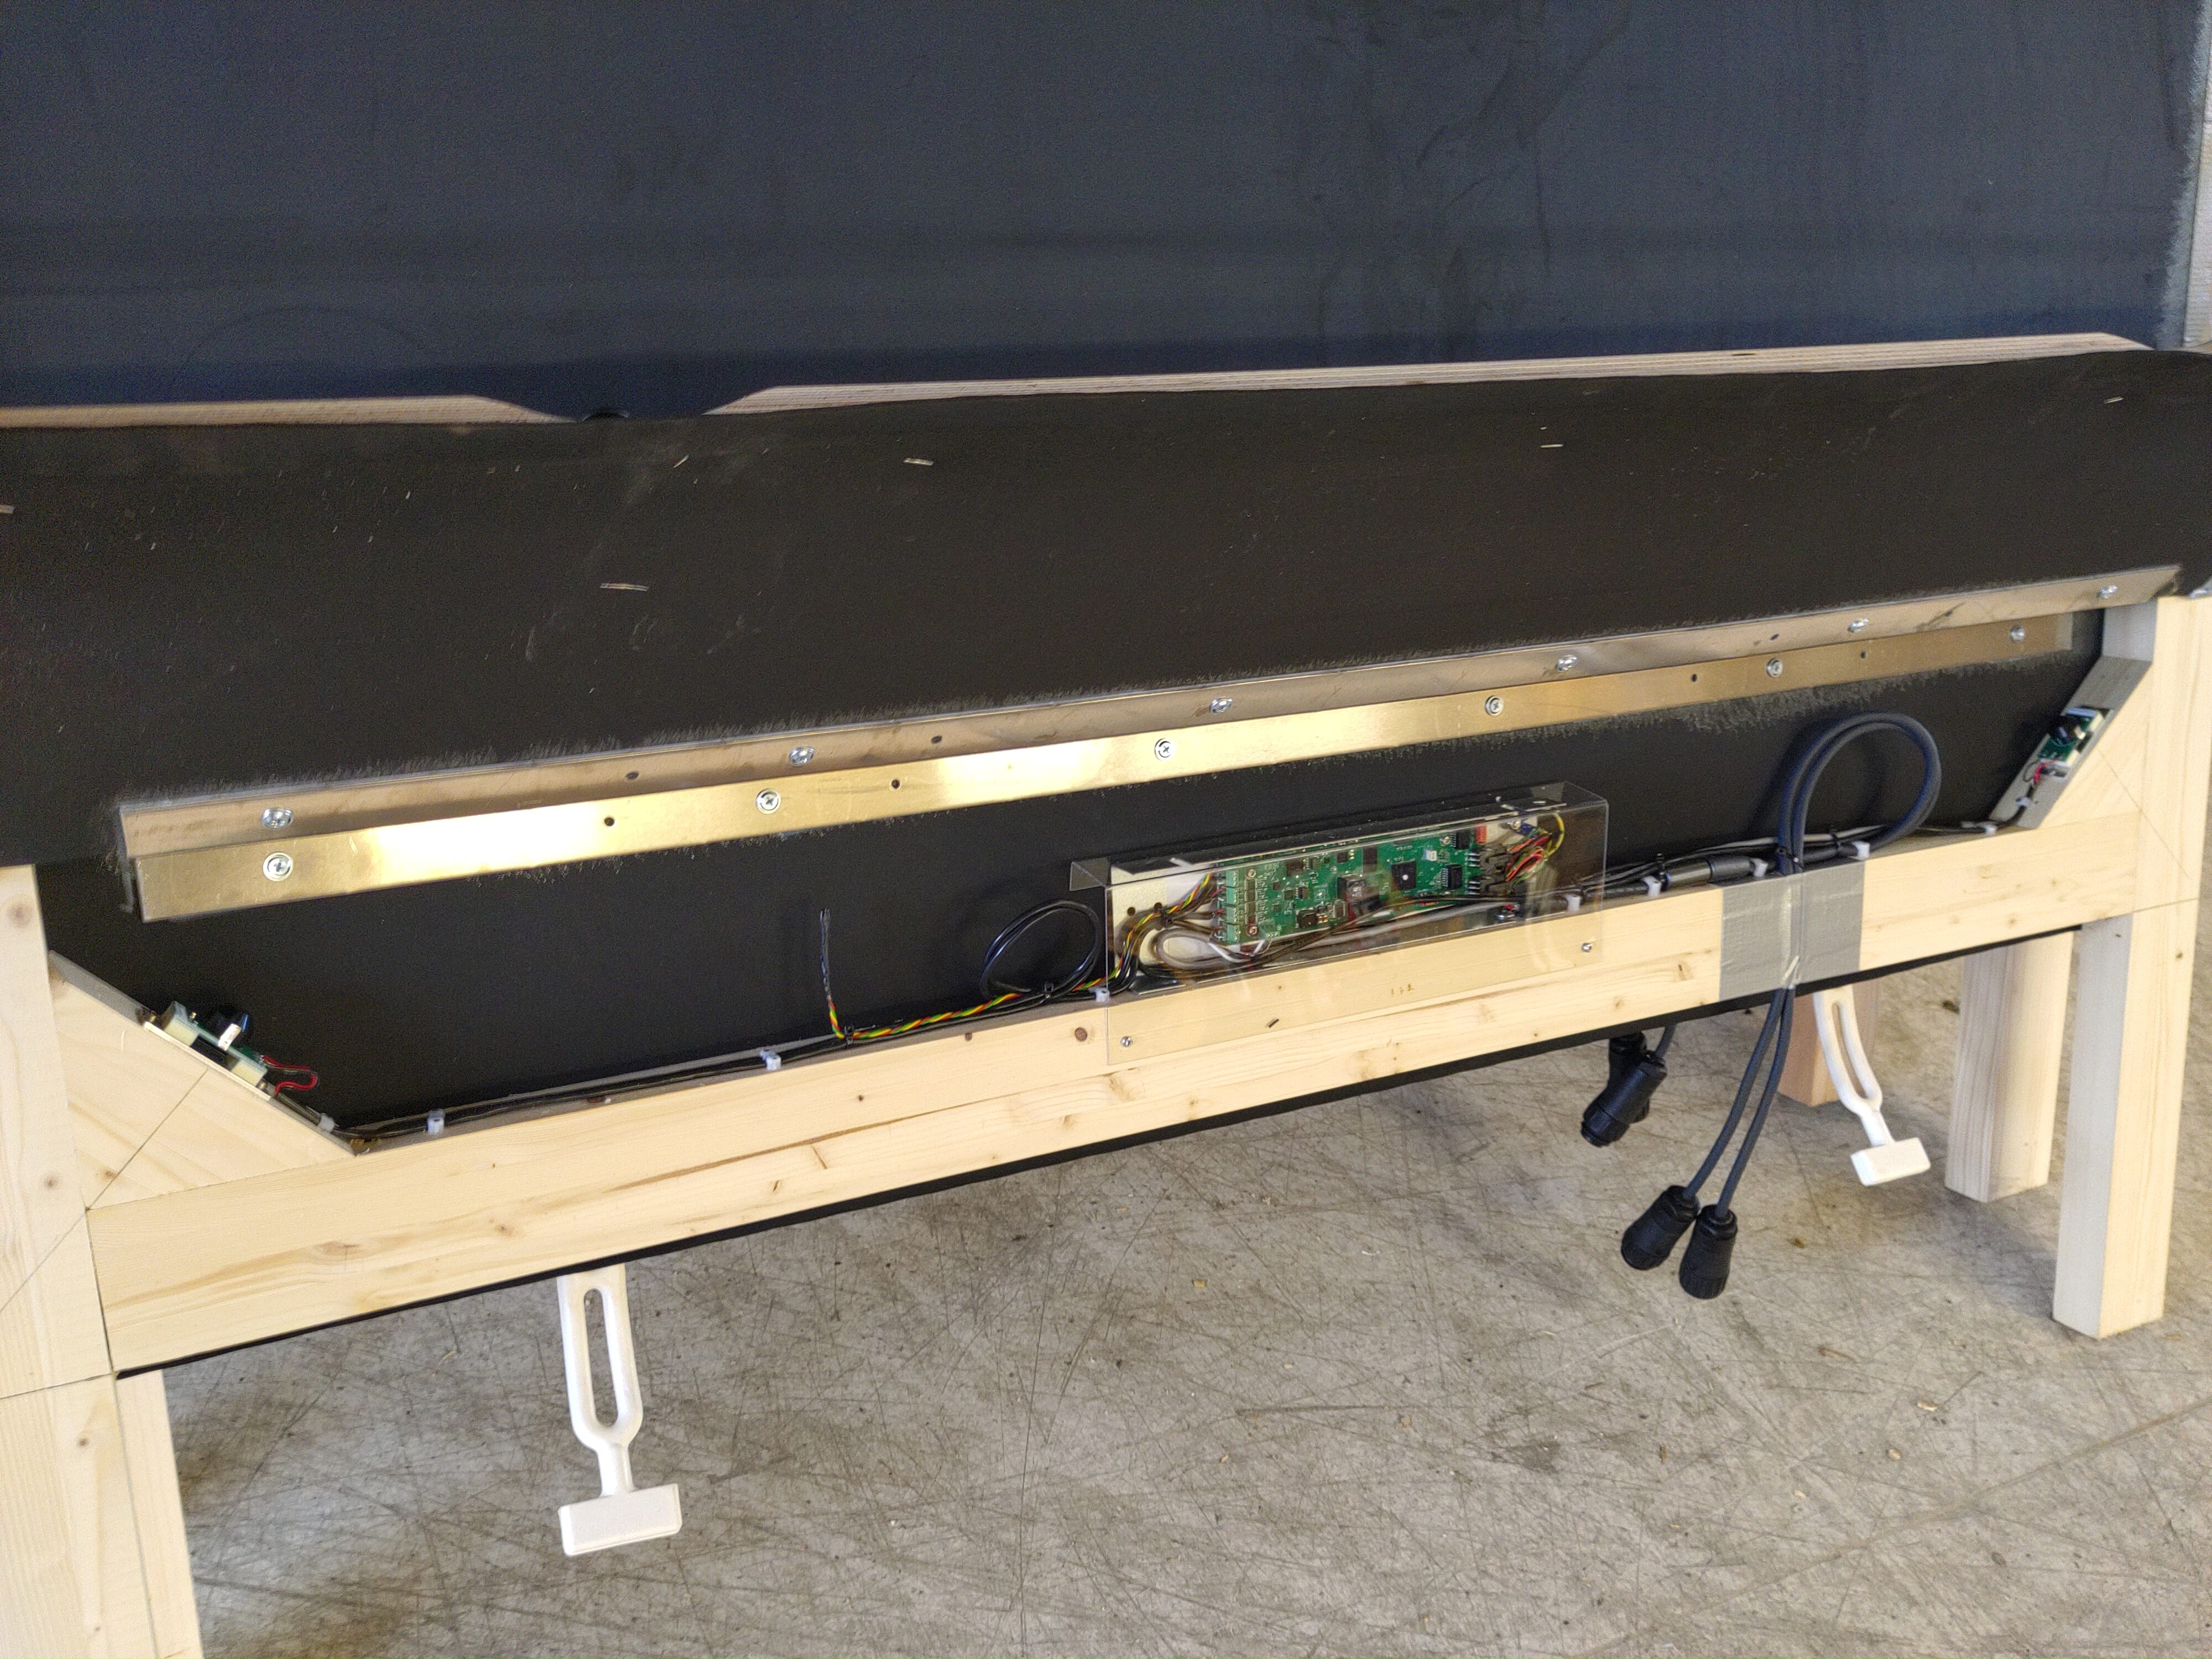 For H-targets the sensors are only placed in the bottom corners, not in the center.
Step 3 - Check sensors
- Visually inspect the sensors
- Lightly touch the sensors to ensure that they are correctly fastened.
- Use a small brush to wipe away debris that may have landed on top of the sensors.
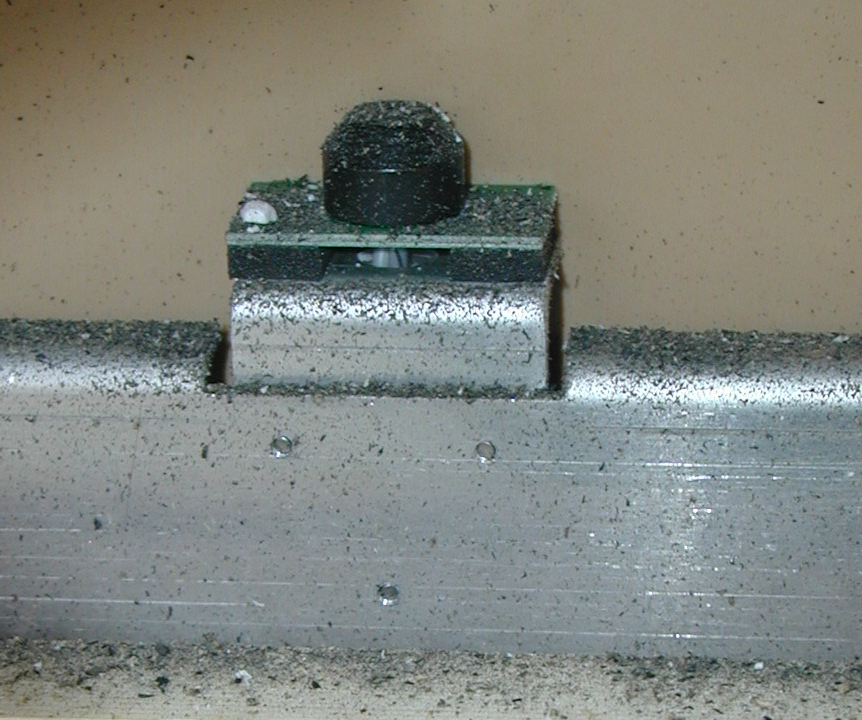
Sensor with debris
Step 4 - close service panel
Close the service panel by attaching the two rubber bands.
Ensure a tight seal around the hatch, both straps must be used.
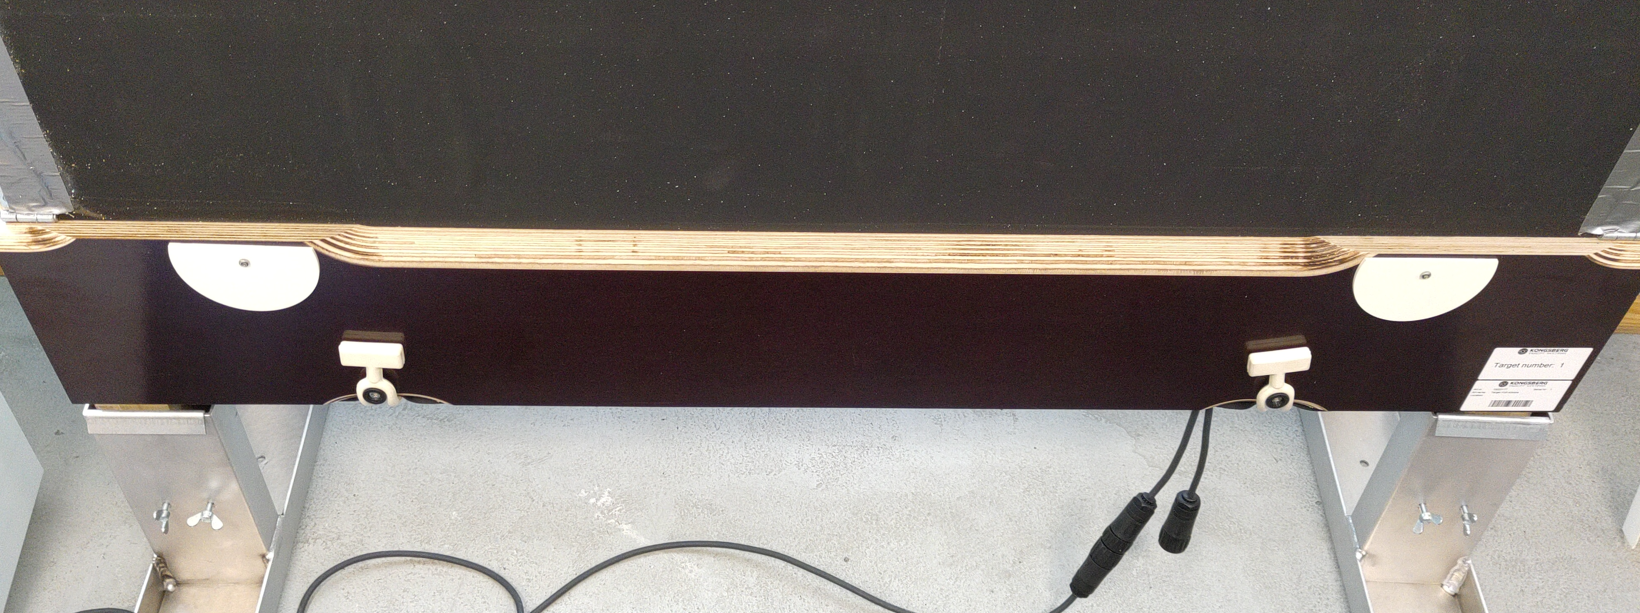
Step 5 - Attach temperature screen and target face
- Install the temperature screen first by entering all four guide pins.
Ensure that the rubber side of the foam faces forward.
- Install the target face on the four alignment pins.
- Fasten the four guide pin nuts by hand. There is no need to use excessive force while fastening these nuts.
- Remember to re-attach the rain cover.
Beskyttelse av U7E-målet
Slik beskytter du U7E-målet mot kuler og rikosjetter
Protecting the eScore acoustic target
The eScore targets have the critical electronics located at the bottom of the tar
The targets have the most critical, or all, electronic components located at the bottom of the target - behind the service panel. To minimize maintenance cost and maintain the target durability it is recommended to protect this section of the target by use of a knee wall or protective plates. Target stands with protective plates are available on request.
Please refer to this YouTube video for recommendations on how to install the targets.
Protection from ricochets and shrapnel
Some shooting ranges have backstop that create shrapnel when bullets hit bullet catchers. This should be avoided since cables may be cut or short circuited by shrapnel or bullet jackets. To minimize the effects careful placement of the wiring between targets, antennas, batteries etc. must be done. If steel bullet catcher is used, make sure to cover it with rubber material or other absorbent material to minimize ricochets and shrapnel exiting the bullet catcher.