
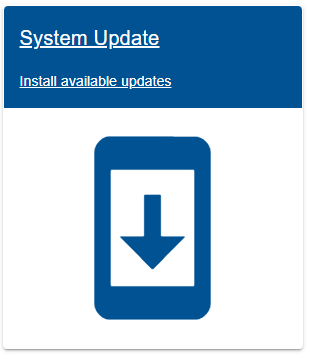
First access the System Update page on eHub
1. Automatic download
The software update will automatically be downloaded on a range with internet connection (WAN port on eHub)
- Click Start upgrade to install the updates.
- After the update is finished the eHub will usually reboot NOTE: Do not turn of eHub during reboot, the boot can take 5-20 minutes to finish depending on the updates.
2. Manual download
Ranges with no internet access can download files from internet and bring the files to the range and do manual upgrade.
Poor internet connection
If you choose to manually upload packages due to poor internet connection at your range, please disconnect you range from internet while uploading the packages and performing the upgrade. Re-connect when finished.
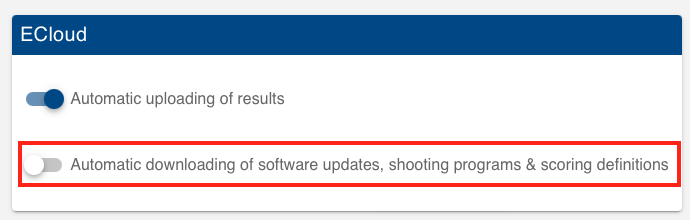
As from version 2024.1.0 it is possible to disable automatic download.
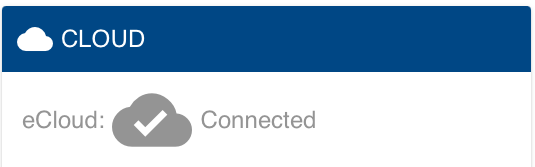
Settings → Cloud → eCloud
- Download all the upgrade files (files are password protected, customers can send an email to software@kongsberg-ts.no to get access):
- In the System Update page on eHub, select Upload and select first file. Repeat this for all files. NOTE: Important to upload all files before starting the upgrade!
- Click Start upgrade
- Please wait at least a minute before you continue to click re-start button.
- After the update is finished the eHub will usually reboot NOTE: Do not turn of eHub during reboot, the boot can take 5-20 minutes to finish depending on the updates.
Getac monitor upgrade
If you have the Getac monitors in your system, you will need to manually upgrade these when installing this release.
Detailed upgrade description can be found below:
Manual Update Instructions for Windows tablets
Update for Windows tablets (Windows / Getac)
This guide describes how to manually apply an update to tablets (Getac or other tablets running Windows) using a USB drive.
🔎 Why This Update Is Required
When upgrading from a version earlier than 1.21.0 to version 1.21.0 or newer, a one-time manual operation is required.
This is due to the expiration and replacement of our previous code signing certificate. The change affects how Windows validates the app and temporarily breaks the automatic update mechanism (trough the eHub) on Windows-based tablets.
Once this manual step has been completed, automatic updates will resume working as normal going forward.
🔄 What the Update Does
- Uninstalls any previously installed version of the application
- Installs the new bundled application version
- Installs the required root certificate for offline validation
- Updates references to the new App ID
- Fixes shortcuts and startup scripts to reflect the new app identity
🔧 What You Need
- Dowload files here (Please contact W5 for password)
- USB stick with update files (extract to the root folder of USB stick)
- Powered-on tablet (eScore-eMonitor can be running)
📘 Step-by-Step Instructions
-
Insert USB stick
Plug in the USB drive to the tablet. File Explorer should open automatically. -
Run the script
Double-click LaunchCertificateAndAppIDFix.bat from the USB drive. -
Allow administrator access
A prompt will appear:
“Do you want this app to make changes to your device?”
Click Yes to proceed. -
Script executes modifications
The script will:
• Install the required root certificate
• Update app identifiers
• Fix shortcuts and startup scripts -
Complete the process
When prompted, you can either:
• Press Y and enter to reboot
• Or close the window to exit without reboot, or Press N and enter
Tip: To bring up the on-screen keyboard, double-tap near the prompt text. -
Device reboots automatically
After reboot, remove the USB stick. The monitor is now updated. - Please note that you need to re-registrer the monitors in settings→ “configure connected units”.
⚠️ Important
If any error occurs during the process:
• An error message will appear
• An alarm sound will play (if audio is enabled)
If you encounter an error message indicating missing dependencies, this can be resolved by running a dedicated installation script.
On the USB stick, you will find a folder named /utils. Inside, there is a file: eMonitorInstallWithDependencies.bat
This script will install any required dependencies and ensure the application runs as expected.
Run this script the same way as the other one (double-click and allow administrator access), and then follow the on-screen instructions.
4. Shooting programs and Target Scoring Definitions
Official shooting programs and target scoring definitions are automatically downloaded when connected to eCloud.
Release log
eHub
Features:
- Support user-defined scaling of scoring definitions
- Improved functionality when editing squadding of the active relay in eControl.
- Show units in eStatus even if they were disconnected at startup of the eHub.
- Support moving shots between series in the active relay
- Support CMP Team Shooting events
Fixes:
- Corrected date and time display in the shot log
- Improve performance of WinGPS Cloud for large systems
- Fixed various minor issues
eMonitor
Features:
- Interactive shot list and graphical view.
By clicking a shot in the shot list or the graphical view, the shot will be highlighted and additional information about the shot will be displayed (time, x/y-coordinated, etc…) - Support CMP Team Shooting events
- Improve sorting and filtering of shooting program selection list
Fixes:
- Performance improvements for graphical user interface
eTarget
Features:
- Support CMP Team Shooting events
Fixes:
- Fixed various minor issues